It is a Saturday afternoon and you are getting ready for a joy ride with your friends, you hop into your car but it just won’t start. You tried to check your battery and start boosting it up but it still won’t do. As you check thoroughly it is something a bit more serious, it is your starter.
 A starter can be hydraulic, electric or pneumatic. It is a device used to rotate an internal combustion engine in order to power up the engine’s own operation. An engine must be initially set in motion and be powered by an external medium before it can power itself on its own, which is the role of starters. They are the external force that sets the engine in motion.
The first starter, which is a self- starter, was invented in 1899, and it became famous in 1920 that almost every vehicle has a self- starter on it.
Types Of Modern Starters
The following are the type of modern starters.
1. The Electric Starter
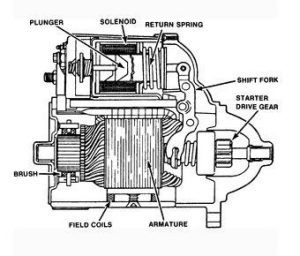
It is a motor which is powered by a direct current and has a solenoid on it. It is one of the so-called modern starters today. The battery will supply the low current power to the solenoid, and it will send a signal to plunge out a small bolt gear on the shaft of the motor of the starter and connect it with the ring gear on the engine’s flywheel, then the engine starts.
2. The Pneumatic Starter
This starter is driven by a system that contains an air compressor, geared turbine and a pressure tank. This type of starter is common on trucks. In this starter, the tanks spins and turbines release air, and then the air, through a set of reduction gears will be engaged to the flywheel’s engine.
3. The Auxiliary Starter Engine
This type is the one which is commonly seen on high powered Diesel engines. As the engine is warmed up, warm coolant and oil is circulated in the diesel engine.
In order for the starter to do its job smoothly, your battery must be in a good working order and must have enough charge. A thorough checking of the cables of your battery will also help; it must be free from corrosion and melted insulation. A high resistance connection may lessen the life span of your starter. In order to avoid this, you must know how to properly replace a starter when it wears out.
What Do You Need?
Before beginning, here are the materials that you will need:
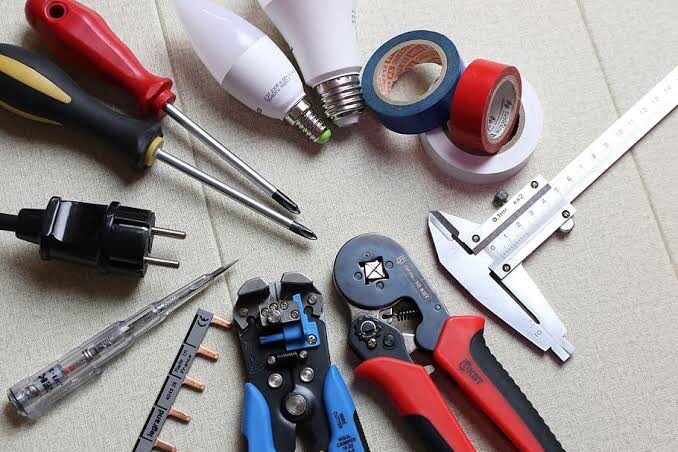
- Screwdriver Set and Pliers Set
- Hydraulic Jack or Drive on Ramps
- Puller for the Terminals of the Battery
- Wrench Set and Socket Set
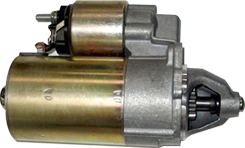
- Replacement Starter Motor from Raptor Auto Parts
- Personal Protective Equipment (PPE)
- Flashlight or any other device that can be a source of lightGloves
Steps In Replacing A DIY Starter
The following are the steps on how to replace a DIY starter.
1. Safety
It is always good to ensure that you are safe when doing a job. First, you must carefully lift your car in order to reach your starter (most cars need to be lifted in order to have a proper view of your car’s starter). Second, carefully read your car’s manual in order to properly locate all of its parts. Make sure that you understand what it contains before starting. Third, lift the hood of your car and disconnect your battery, remove only the negative cable. Before proceeding, always make sure that you are wearing the proper protective equipment such as eye goggles for the protection of your eyes.
2. Installation
Before installation, you must make sure that you have the best and suitable starter for your car. You can check Raptor Auto Parts for the best and specific parts that you need. After gathering all the tools that you will be needing and wearing the proper protective equipment, let the engine cool first.
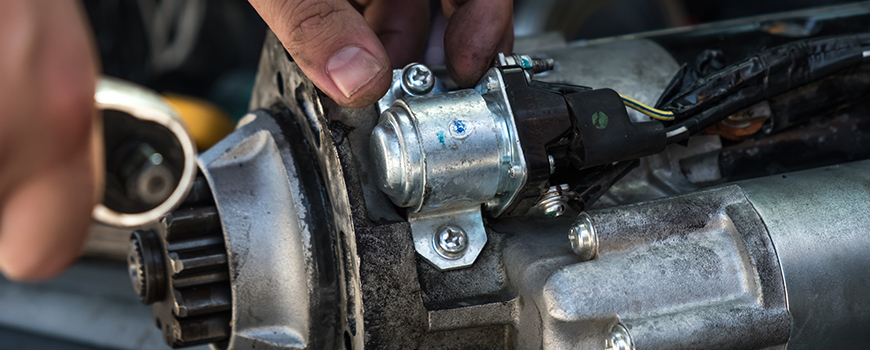
3. Replacement
- Detach the cable of your battery connecting to your car’s starter. Remove any other wires connected to it; make sure to note the location of each. It will help you on the reconnection later on.
- Remove two or more attaching bolts of your starter. These bolts are usually horizontally attached through the mounting flange. You must remove all the supporting brackets that are holding the front part of the starter.
- Carefully put down the starter. On some cars, the disconnection of an idler arm or the turning of the car’s wheels to one side might be necessary. While on others, you may be required to remove the transmission oil cooler brackets, the cross member, exhaust pipe, the housing cover of the flywheel, oil pressure sending unit or all other parts that you need to loosen or remove in order to give you enough clearance to carefully drop your car’s starter down.
- After successfully removing the car’s old starter, clean all the mounting surfaces. Carefully install the new starter following the reverse order of removal. It should be noted that starters contain magnets which are brittle or easy to break and can crack hindering the starter performance if not handled carefully.)
- Reconnect the battery cables and all other wires that you removed to the starter. Make sure that all the wiring mounting nuts have been tightened; reinstall the cover of the terminal. Before removing your car on the drive on ramp, double check all the wiring and cable connections in order to make sure that there is no ground contact.Note: When reconnecting the negative cable of the battery, you must carefully touch and release the cable to the terminal of the battery; this will help you test for a possible short circuit. A little spark may be visible but it is important to know that it is normal; however a large spark could be an indication that there is a problem with the installation of your starter.
- Be sure that you replace all the original shims or washers when you remove the old starter of your car. When you start the testing stage and hear a noise when starting the engine or a little whine after starting, the adjustments of some shims might be necessary.
- If you heard a noise on your starter when you crank the engine, the removal of a full length of shim or the addition of a short one to the outboard pad might be necessary.
- When a high-pitched whine is heard after starting the engine, you must add full length shims one at a time until the whining sound disappears. You must not add more than four shims or washers. In order to add shims one at a time, loosen Bolt A and Bolt B, add a shim and retighten the bolts again.
How to Replace Your DIY Starter- Mounted Solenoid
If your car has a starter-mounted solenoid, here’s how you replace it.
1. Replacing the Solenoid
Solenoids are either located on the starter or a panel in the engine compartment. The following are the steps in replacing a panel mounted solenoid.
- Lift the hood of your cart and remove all the cables that are connected to the battery and starter. Be sure to take note of all its initial positions so that it will be easy for you when it is time for re-installation. All the mounting screws must be removed then lift off the solenoid.
- Install your solenoid. You can check Raptor Auto Parts for the best and appropriate products that you can use. You must reconnect all the detached wirings and cables to their original places. Tighten all the
2. Your Starter-Mounted Solenoid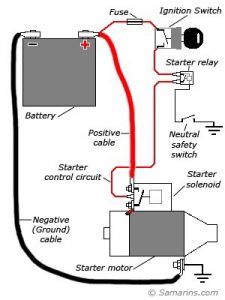

- First, remove the starter.
- Then, remove the coils strap from the terminals of the solenoid.
- Remove all the attaching bolts, shims and screws, then remove the solenoid’s housing. In some cars, you must rotate the solenoid’s housing while on some cars the spring and the plunger might be loose.
- Install the new solenoid based on the reverse order of its removal. If you noticed that the plunger stays with the solenoid, the end part must be engaged with the starter shift lever. If the plunger remains attached to the car’s starter, lock it in the solenoid. It must be noted that the spring is in place between the solenoid body and plunger.
- Reconnect all the cables and connections when installing the starter.
- Reconnect the cable to your car’s battery.
To Sum It All
A lot of information must be read when replacingyour car’s starter. The battery of your car sends a charge to its starter and sends it to the alternator. This charge causes your car to start. Having a bad or worn out starter may affect the battery’s sending of charges resulting in a dead car.
It is best to study everything about your car and the starter that you’re going to install. Raptor Auto Parts offers a variety of auto parts, from starters to alternators, depending on the type of car you have.